| |
| |
So far, we’ve seen that Tridash is good at producing an output, which is a function of a given input, and ensuring that it is always synchronized with the input. What we haven’t seen, however, is mapping a previous output to a new output. In-fact, with the tools introduced so far, this is impossible.
To be able to map a previous output to a new output, a binding has to be established in which the source is a function of the target node. As an example, to implement a counter, intuitively we might do the following:
# This does not work!!!
counter + 1 -> counter
The problem here is that a change in the value of counter triggers a
change in the value of counter, which triggers a further change in
the value of counter ad infinitum. What we require is a way to
tell Tridash, that when the value of counter is updated to counter
+ 1, it should not trigger another update to the value of counter +
1. We also need a way to specify when we would like the value of
counter to be updated to counter + 1, as updating it only once is
hardly useful.
Node states allow us to control when the value of a node is updated,
beyond the simple rule of whenever the value of one of its dependency
nodes changes. The target of a binding can have an explicit state
associated with it, using the :: operator. In this case the binding
is referred to as a stateful binding.
Explicit state using :: operator.
a -> b :: state-id
The left-hand side of the :: operator is the node and the right hand
side is the state identifier, which is a symbol identifier (similar to
a context identifier). The result of this is that the binding a -> b
only takes effect when b switches to the state with identifier
state-id. The emphasis is on switches as a change in the value of
a will not automatically trigger a change in the value of b. Only
a change in the state of b will trigger a change in its
value. This may seem counter-intuitive at first, however if b was
updated on every change in the value of a, and instead of a we
have b + 1 we’ll end up with the same problem, as in the previous
section.
Stateful bindings declared later in the source take priority over those declared earlier. |
A node’s state is determined by the value of the special node
/state(node). Binding to it allows us to control a node’s state.
Example: Counter.
counter + 1 -> counter :: increment
/state(counter) <-
case(
should-increment? : '(increment),
'(default)
)
The |
In this example, a binding counter + 1 -> counter is established
which only takes effect when counter switches to the increment
state.
The second declaration binds a case expression to the
/state(counter) node, thus controlling the state of counter. When
should-increment? is true the value of the case expression, and
thus the state of counter is increment, otherwise it is default.
The result is that when the value of /state(counter) (the state of
counter) is updated to increment, the value of counter is
updated to it’s previous value incremented by 1.
To provide a runnable example, we have to interface with JavaScript in order to hook into its event system. In the next major release of Tridash, this wont be necessary.
This section will go over only the basics of interfacing with JavaScript, which are necessary for completing this tutorial. A full in-depth tutorial on interfacing with JavaScript, will follow.
Tridash nodes are compiled to runtime node objects, which store the
node’s value. To be able to reference a runtime node object from
JavaScript, the node has to be given an identifier with which it can
be referenced. The public-name attribute, if given, determines the
name of this identifier.
Once an identifier is given, it can be accessed as a member of the
nodes property of the runtime module object. To access the runtime
module object of a compiled Tridash program, embedded in an HTML file,
it needs to be given an identifier. The module is then accessible via
a global variable with that identifier. This is achieved using the
module-name output options.
Currently Tridash does not check whether multiple nodes are
given the same |
Example: Setting public-name identifier.
/attribute(node, public-name, "aNode")
Example: Referencing the runtime node object in JavaScript.
// Assuming runtime module is stored in variable mod var node = mod.nodes["aNode"]; // or equivalently if the public-name is a valid JS variable name var node = mod.nodes.aNode;
Once a reference is obtained to the runtime node object, the node’s
value can be set using the set_value method, which takes the value
as an argument.
Example: Setting Node Value from JavaScript.
node.set_value(1);
It is important, however, that if set_value will be called on a
runtime node object, the node is marked as an input node, by setting
its input attribute to true.
/attribute(node, input, True)
Not every Tridash node corresponds to an actual runtime node object, due to some intermediate nodes being optimized out by the compiler. The only nodes, for which it is guaranteed that a runtime node object is created, are input nodes and nodes with no observers, which are assumed to represent output nodes. |
In this section we’ll build a very simple application consisting of a counter which is incremented when a button is pressed.
Let’s start off with the Tridash binding declarations. We’ve in-fact already written the bulk of the code in the previous example, which we can simply copy into our new application.
counter + 1 -> counter :: increment
/state(counter) <-
case(
should-increment? : '(increment),
'(default)
)The node counter stores the value of the counter which is
incremented when should-increment? is true. We’ll add the attributes
which are necessary in order to be able to set the value of
should-increment? from JavaScript, namely we need to set the
public-name identifier and mark it as an input node.
/attribute(should-increment?, input, True)
/attribute(should-increment?, public-name, "should_increment")
We’ll allow the user to set/reset the value of the counter by binding
a start node to an input field. We’ll bind start directly to
counter and give it an initial value of 0.
start -> counter
0 -> start
Now let’s define the user interface. We need a text input field for
entering the initial value for the counter, which will be bound to
start and an increment button. The value of the counter will be
displayed below the counter.
ui.html.
...
<div><label>Start: <input value="<?@ to-int(start) ?>"/></label></div>
<div><button id="increment">Increment</button></div>
<hr/>
<div><strong>Counter: <?@ counter ?></strong></div>
...
The HTML boilerplate is not shown. |
We’ve given the Increment button the ID increment so that we can
attach an event listener to its click event. We’ll do so using the
following JavaScript code, in a script tag which should be added below
the element where the counter is displayed:
<script>
  document.addEventListener("DOMContentLoaded", async () => {
      const module = await mod;

      const increment = document.getElementById('increment');
      const node_increment = module.nodes.should_increment;

      increment.addEventListener('click', function() {
          node_increment.set_value(true);
          node_increment.set_value(false);
      });
  });
</script>
A couple of things to note:
mod. The runtime module object identifier will be set
with the module-name output option.
DOMContentLoaded event to ensure that it is run after the
JavaScript code which assigns the runtime module object to mod.
await is applied on the module object mod, inside an async
callback function, since the module itself may be created
asynchronously. This is the case when the compilation target is
WebAssembly (wasm32).
The callback function, run after all HTML elements and scripts have been loaded, does the following:
increment.
should-increment? node which was given
a public-name of should_increment.
The remainder of the function attaches a listener, for the click event,
on the Increment button. In that listener we first set the value of
the should-increment? node to true, then immediately afterwards we
set it to false again.
Setting the value of should-increment? to true, causes the state of
counter to change to increment. Setting it back to false again
causes the state to change to default.
In a future release, when the HTML library is complete, a
subnode |
Change the build configuration file (build.yml) to the following:
build.yml.
sources:
  - path: ui.html
    node-name: ui

output:
  path: app.html
  type: html
  main-ui: ui
  module-name: mod
The addition of the line module-name: mod sets the module-name
output option to mod, which is the identifier of the variable in
which the runtime module object will be stored.
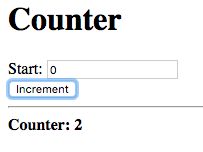
Build and run the application, and press the increment button a few times:
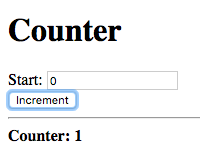
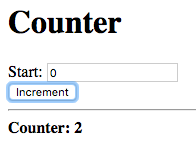
The displayed value, for the counter, is incremented after each press.
Now enter a value in the Start field to reset the counter, and then press the increment button again:
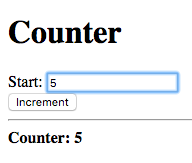
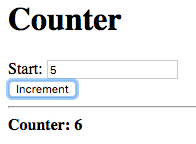
The counter is reset to the value entered in the Start field. Pressing increment afterwards increments the new counter value.
Let’s do a little experiment, comment out the line, in the click event handler, which sets the value of the should-increment? node to false, i.e. comment out the following:
node_increment.set_value(false);
What do you expect to happen? Initially, we might think that since the
should-increment? node is not being reset to false, the state of
counter is not being reset to default. The state of counter will
thus switch to increment once, after which, there are no further
state changes. The result is that the counter will only be incremented
the first time the increment button is pressed.
Let’s try it. Build and run the application and press the increment button twice.
What happened? The counter carries on incrementing after the first button press. Why?
The declaration:
counter + 1 -> counter :: increment
states that the binding should only take effect when the state of
counter switches to the increment state. Switching from the
increment state to the increment state is still considered as
switching to the increment state, even though the new state is
identical to the previous state. This is due to the fact that each
time we’re setting the value of the should-increment? node to
true, we’re triggering a change in the value of the node
/state(counter) and thus the state of counter, even though the new
value of should-increment? is identical to its previous value.
The above declaration should thus be thought of as declaring a binding
which takes effect whenever counter switches from any state,
including increment, to the increment state.
To fix this issue we can specify an explicit from state. When specified, the binding only takes effect when the state of the node changes from the from state to the to state. This is specified using the following syntax:
Node State Binding with Explicit From State.
a -> b :: previous => next
When the state identifier is a functor of the form previous => next,
previous is interpreted as the identifier of the from state and
next is interpreted as the identifier of the to state.
To achieve the intuitive behaviour we can limit the binding counter +
1 -> counter to only take effect when the state of counter
transitions from default to increment. Replace the binding
declaration of counter with the following:
counter + 1 -> counter :: default => increment
This implementation will, however, require two initial button presses
before the counter starts incrementing. This is due to the fact that
we haven’t given counter an initial state. The first press causes it
to change to increment, and then back to default, however since it
is not a change from default to increment, the binding does not
take effect. We can fix this by giving /state(counter) an initial
value of default.
Setting Initial State.
'(default) -> /state(counter)
Now the counter starts incrementing after the first press.
Let’s repeat the experiment on this new implementation, comment out
the line, in the JavaScript script tag, which sets the value of
should-increment? to false. The counter should only increment the
first time the Increment button is pressed.
This example served to demonstrate the difference between a stateful binding with and without a from state. However, in this example, there is no value in specifying a from state, as the previous example, without a from state, was simpler and performed the same function.
In this example, we’ll build a silly application in which the Increment button, the button which actually increments the counter, alternates between two buttons. The goal of this example is to demonstrate what can be done with stateful bindings with a from state that cannot be done with stateful bindings without a from state.
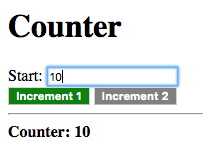
We’ll start off with a similar interface to the previous counter application, however with two increment buttons.
ui.html.
<h1>Counter</h1>
<div><label>Start: <input value="<?@ to-int(start) ?>"/></label></div>
<div>
  <button id="increment1">Increment 1</button>
  <button id="increment2">Increment 2</button>
</div>
<hr/>
<div><strong>Counter: <?@ counter ?></strong></div>
Both button’s have been given ID’s as we’ll need to attach event listeners to both buttons, in JavaScript.
We’ll need two nodes clicked1? and clicked2? which change to true
when the first and second buttons are clicked, respectively. The
values of these nodes will have to be set via JavaScript, thus we’ll
mark them as input nodes and set their public-name attributes:
/attribute(clicked1?, input, True)
/attribute(clicked1?, public-name, "clicked1");

/attribute(clicked2?, input, True)
/attribute(clicked2?, public-name, "clicked2");
The following JavaScript code attaches event listeners for the clicked events, of both buttons, which simply set the value of the corresponding clicked? node to true and them immediately to false, again.
document.addEventListener("DOMContentLoaded", async () => {
    const module = await mod;

    const increment1 = document.getElementById('increment1');
    const increment2 = document.getElementById('increment2');

    const clicked1 = module.nodes.clicked1;
    const clicked2 = module.nodes.clicked2;

    increment1.addEventListener('click', function() {
        clicked1.set_value(true);
        clicked1.set_value(false);
    });

    increment2.addEventListener('click', function() {
        clicked2.set_value(true);
        clicked2.set_value(false);
    });
});
We’ll need two states for the counter node:
increment1
increment2
The value of counter should be incremented only when its state
switches from one state to the other, i.e. the button, which was
clicked, is different from the previous button to be clicked. This can
be achieved using two stateful bindings which take effect during the
state transitions increment1 => increment2, increment2 =>
increment1.
counter + 1 -> counter :: increment1 => increment2
counter + 1 -> counter :: increment2 => increment1
|
counter will retain its previous value during any other state
transition.
We need to set counter's state, to increment1 or
increment2, based on which button was clicked last. To achieve that
we can exploit the fact that each explicit binding to a node, without
an explicit context, results in the creation of a new context. When
the value of the source node, of the binding, changes, the binding
context is activated.
We know that the value of clicked1 changes to true, and then to
false, again, when the first button is clicked. The same is true for
clicked2 when the second button is pressed. We want the state of
counter (/state(counter)) to be bound to the literal symbol
increment1, when the value of clicked1 changes regardless of what
that value is. For that, we can use the utility !- meta-node,
introduced in Section 9.3, “Improved Error Handling in Adding Numbers”, which
returns the value of its second argument if its first argument does
not evaluate to a failure.
The following are the binding declarations which set the state of
counter.
clicked1? !- '(increment1) -> /state(counter)
clicked2? !- '(increment2) -> /state(counter)
The sole purpose of the |
To make it obvious which button should be clicked, we’ll make the
button which increments the counter change to green. We’ll bind each
button’s background color to "green" if the other button was the
last button to be pressed, and "gray" if it was the last button to
be pressed. This is achieved with the following:
increment1 <- /state(counter) = '(increment1)
increment2 <- /state(counter) = '(increment2)

case (increment2 : "green", "gray") ->
    self.increment1.style.backgroundColor
case (increment1 : "green", "gray") ->
    self.increment2.style.backgroundColor
We’re comparing the state of counter directly to determine which button was pressed last. |
Finally, let’s make the initial state of counter, increment2 so
that pushing on the first button, increments the counter.
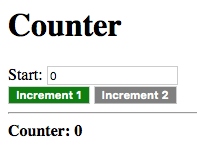
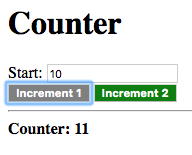
Build and run the application. Initially you should see something similar to the following:
Click on the green Increment 1 button:
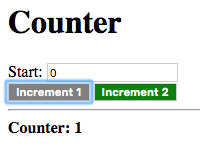
The counter is incremented by one, and the button changes to grey with the other button changing to green. Clicking on the same, now grey, button will not affect the value of the counter.
Click on the green Increment 2 button:
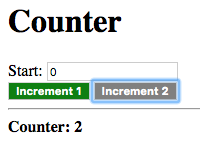
The counter is incremented once again, and button Increment 1 changes back to green with button Increment 2 changing back to grey.
Just to make sure everything works properly let’s reset the counter and push the green button to increment it.
Everything works as expected. The state of counter does not affect
the binding start -> counter as it is a stateless, without an
explicit state specified, binding.
Try out the following as an exercise:
| | ||